Wednesday, September 12, 2007

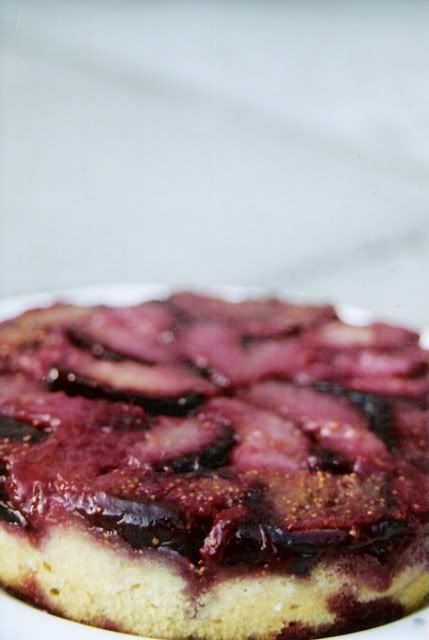
Spiced Fig and Italian Prune Plum Cake

Photo Sharing and Video Hosting at Photobucket

One of the harbingers of summers twilight, Italian prune plums are like
that hot girl at the party.
Even though you might want to get next to them and talk shop , you can't help hating them too.
But, really , its not their fault they're cute.
And so what? They showed up a little late to the party.

Don't get turned off by the name.
Prune is used as an adjective here describing a type of plum.
It's true.
These little purple grenades are avatars of those infamous fiber fortified prunes. Once dried out and packaged,they serve as a solution for a common "binding" problem. Not usually the kind of thing you get a hankering for unless your into that kind of thing.
But these guys are first and foremost plum's, the likes of which even a sugar plum fairy could'nt shake.

Before making that transformation Italian prune plum's defend an allegiance to all things sweet.
Biting into one they may not seem formidable in the face of the overwhelming choices of fruit available this time of year.
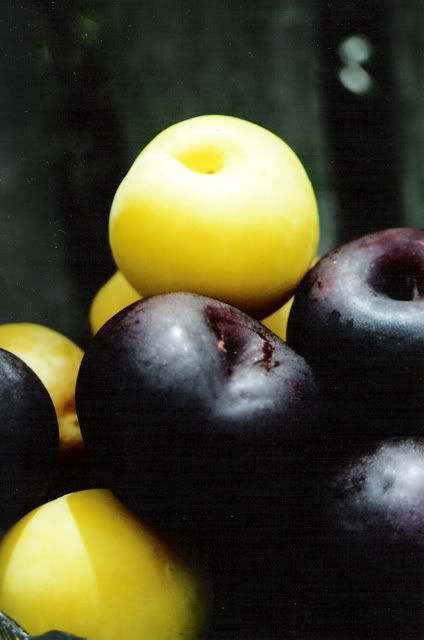
Not quite as succulent and drippy as their more punctual summer produced cousins, Italian prune plums have a suspicious spring green interior that might shock you. They hold onto summers own color with an unfailing grip smuggling it under contrasting purple skin, and carrying it faithfully into fall like a souvenir of warmer months.

Take a breath Sally, and Warm them up.
Once baked they give up the goods - fathoms of fructose.

Sweet and tender, they mix well with quartered black mission figs (also purple and decidedly hanging out this time of year), or cousin plums who make a cameo in my version.
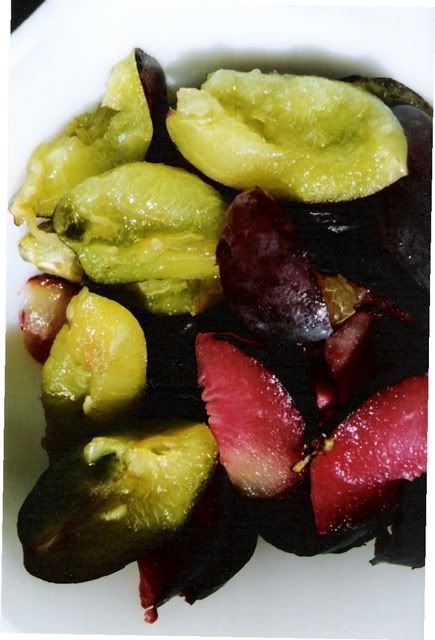
Photo Sharing and Video Hosting at Photobucket

The basic recipe follows.

Its amazing on its own, though fun to experiment with.
As it is a kind of upside down cake, part of the charm is playing with the cut fruit and arranging it into patterns.

Ive turned out a few variations.
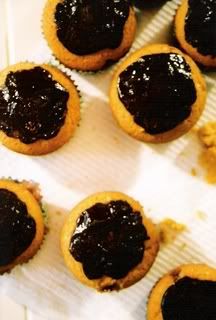
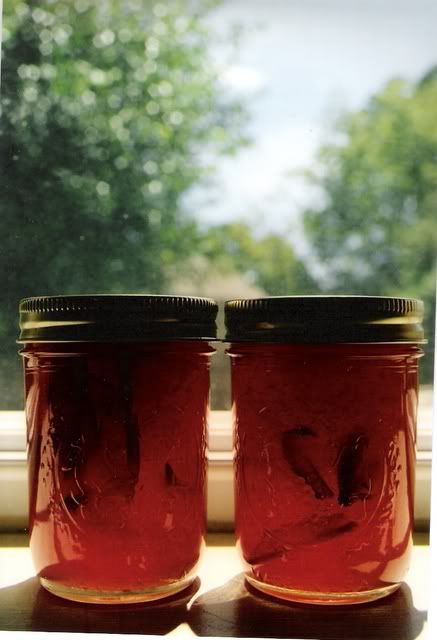
My favorite involves using mini pan tins scavenged from a friend addicted to Table Talk Pies. I made mini layer cakes alternating with ganache made from a Calindia bar from Vosges chocolate , and a complimenting jam canned earlier in the month.

Not a single cake survived the day,but nothing beats the unadulterated original.
A little bit of summer slips into fall with each fork-full; plum syrup soaking down into warmly spiced buttery cake.


Spiced Fig and Italian Prune Plum cake

  • 3 Dark plums
  • 4 Italian Prune Plums
  • 6 figs

  • 3/4 C lite brown sugar
  • 3/4 C white sugar

  • butter for cooking fruit (a few teaspoons)
  • salt

  • 1 1/2 cups all purpose flour
  • 1 1/2 teaspoons baking powder
  • 1/4 teaspoon salt
  • 1/4 cup softened butter
  • 2 eggs room temperature
  • 3/4 cup buttermilk (make sure it is the real deal - cultured as opposed to flavored)
  • 1 1/2 tablespoon brandy or amaretto

  • 1/4 teaspoon ground cardamom
  • 1/4 teaspoon nutmeg or allspice
  • 1/4 teaspoon cinnamon


* Optional: orange and lemon zests. roughly 1/2 teaspoon.

Preheat oven 350

Quarter the figs and cut and pit plums. Italian prune plums are super easy.The pit practically walks out on it own. Cut the proper plums into 6 slices each and the Italian Prune Plums into 4 slices each.

Coat the pan in butter with some to spare and cook the fruit, dusting with sugar and flipping with a spatula to ensure both sides get zapped. Dump in the rest of the white sugar and give it a good whirl. Top with a lid and simmer till it reaches a jam like consistency. Don't over cook or the fruit will get mooshy.

Butter a 6-8 inch spring form pan and arrange the fruit upside down in the bottom however you like.Use a slotted spoon to remove the fruit reserving the syrup for a topping at the end. You can either pour it over the fruit before baking or serve it on the side.
Keep in mind you want the fig quarters face down so that when you release the cake their interiors will be facing upward , smiling with seedy grins.

Mix the baking powder, salt and flour along with the spices and zest if your using it.
Beat the butter with brown sugar (be sure to firmly pack the brown sugar).
Dump in a third of the dry ingredients , then half the buttermilk, another third of the dry ingredients, the final bit of buttermilk and then finally the last bit of the dry ingredients.

Beat in the liquor.

Spill the batter like a blanket over the fruit and cook for roughly 35 min at 350.

Friday, September 7, 2007

Interview: Amy Stevens


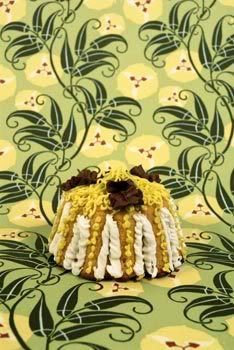
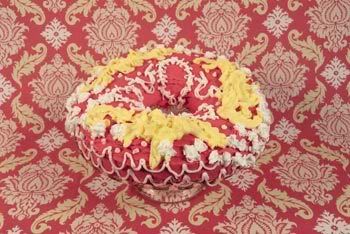
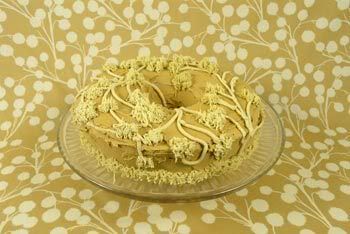
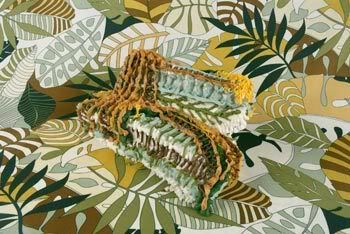
Stare too long at Amy Stevens work and you might just give yourself a visual toothache. Starting with an idea to make 30 birthday cakes as a marker of an upcoming birthday, Amy's work has cooked up into something with its own pulse. Two parts Lisa Frank with a dash of miss Havisham, her confections are camouflaged or menacing, like wild things colored to warn unsuspecting predators of what might just lay within.Doling out generous portions of pattern and color, Stevens cuts right past dinner and gives you what you really want.
And you don't even have to finish your Lima beans.

I happened across her work at mew gallery this summer,curiously enough on my way to sign up for a cake decorating class. Unfortunately Amy is not the instructor.

She currently has a show up at The Center For Emerging Visual Artist's through September 20th ( 237 S. 18th St., Suite 3A Philadelphia). Opening reception Friday, September 14th 5:30 - 7:30.


Photo Sharing and Video Hosting at Photobucket


Joe: You mention your initial investigation into cake making on your website. Would you mind talking a little bit about why you decided to make cakes in the first place?

Amy: For a little more than a year prior to starting this series I was using cake imagery from my collection of vintage cookbooks in my collage and mixed media work. I was also making abstract paintings that mimicked icing-- as well as incorporating stencils and images of cakes. Before I started making my own cakes, I was a bit of a collector of images of them - but mostly from 1950's cookbooks.

Joe: Did you bake growing up?

Amy: I loved to bake when I was growing up. Cookies, pies, cakes-- anything my mom would let me bake. It's a very precise and methodical process that somehow relaxes me. And I have a sweet tooth!

Joe: The "backdrops" you use work as a pivot in your photographs. It appears that you choose the fabric first, is that true? How do the two relate? Are you working with the pattern or against it?What is your process like?

Amy: Yes. The first ten or so in this series I made the cakes first, but as I made more and more (I think I'm somewhere in the 60's now) the easier it became to choose the fabric first and then see where I could take the cake
as opposed to finding backgrounds to go with the cakes. My cake decorating skills aren't the best, so I may start out trying to mimic and pattern in the fabric and end up with something totally different.Decorating each cake is a very intuitive process and very much the same way I would approach a canvas or any other substrate for my art. The fabric is used as a springboard for color and pattern and I just go from there.

Joe: In college I can remember having conversations at length about pattern.I found it interesting that something seemingly benign like
a decorative border had a lot of power in "the old world."People believed that the repetition would hypnotize and thus entrap evil spirits.Another point i remember is how pattern sets up a visual expectation and can make the viewer feel psychologically comforted since they know what to expect next. Would you agree with that?

Amy: Definitely. It's funny because I love pattern and am always drawn to it,but have never really tried to analyze the meaning behind it and it makes a lot of sense.

Photo Sharing and Video Hosting at Photobucket

Joe: What do you look for in a pattern?


Amy: Color is usually the first one since I have been grouping them by theme,but then it's just based on my personal taste and what's out there. I have a favorite place for buying fabric (reprodepotfabric.com) that never fails to inspire and feed my cravings for great patterns. The wilder and crazier-- the more fun it is to decorate the cakes, so I always take that into consideration as well.

Joe: The palette in your work is so varied and just as satisfying as actually eating a piece of cake. It's like licking icing off a spoon with your eyes. Ranging from play-dough colors (as in confections #26) to more
earthy avocados and turquoise (as in confections #41 and #48),what influences your color choice?

Amy: My past four groupings of work have been related to each other by color theme. As my work remarks on domesticity and decor, I have been making each sub series of work for each new show in a different color theme according to the season. For example, my Inliquid solo show in February was all reds and pinks, this summer I had two shows-- one at The Icebox in a group show with whites and yellows and another at Mew Gallery with Blues, greens and whites. My latest which opens August 30 at the Center for Emerging Visual Artists will be of a botanical theme (for the patterns) and colors are greens, browns and some salmon pinks. For this show I will also be painting the walls to match the work to create an environment.

Joe: How do you feel about the word decoration?Do you feel like your works are "decorative?"


Amy: I know that to some artists the word decoration is a bad word-- some might shudder at the thought that their piece of artwork would actually be purchased because it matches the couch or decor of a room. My work is all about decoration. Many layers of it in fact.

Joe: Where do you find inspiration?

Amy: Other artists, wallpaper patterns, fabric, home decorating magazines.

Joe: Do you eat the cakes when they are done?

Amy: If I ate all the cakes I made I would be obese and diabetic! It's sad they go to waste, but sometimes they sit in the studio a while before I get to shooting or decorating them, so they get a little stale-- probably not the tastiest.

Joe: What kind of cake are they?

Photo Sharing and Video Hosting at Photobucket


Amy: Yellow.


Since I know these don't get consumed, I don't splurge on the finest of butter and eggs-- just the basics to get the job done. Of course when I bake for my receptions-- I get to be creative with the cake and not just the decorating. I've made red velvet cupcakes, chocolate and coconut in the past.


Joe: Do you see a strong connection between your collage and cake making?

Amy: It's all connected-- all of my work.

Joe: What music are you currently listening to?

Amy: Well, let's see, just to name a few of my summer picks: the new Iron and Wine, Andrew Bird, Elvis Perkins, M. Ward, Mary Timony, Spoon, The New Pornographers, Field Music, Thievery Corporation, Astrud Gilberto...

Photo Sharing and Video Hosting at Photobucket

Thursday, August 30, 2007

Chicken Under a Brick

Photo Sharing and Video Hosting at Photobucket

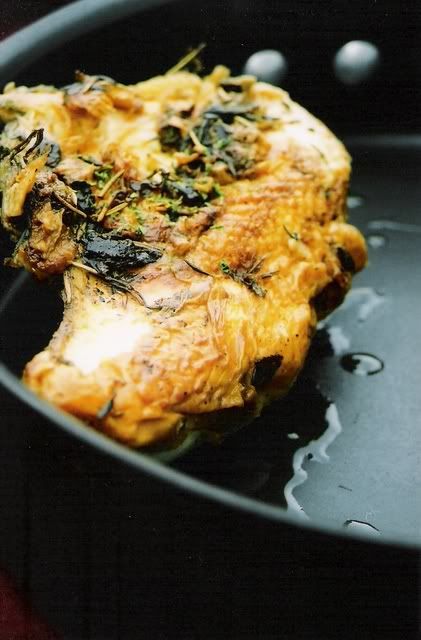
Marinated in olive oil, evenly browned in a skillet ,and finally transferred to a hot oven, you can expect a beautifully crisp and flavorful dish permeated with a small battalion of savory herbs.
It is the brick that accounts for the cracker crunchy skin. When you top off your hot skillet with bricks, your adding 2 lb weights that keep that juicy tender chicken down to brown on all points of contact. The result is something sensational.
I realize bricks aren't a part of every ones kitchen cache, but I can't imagine why you wouldn't be able to find one.
In the event that you have chosen a simple life away from suburban sprawl,or
live in one of those parts of town without relentless construction I have other options for you.
The first,though somewhat advanced, involves a twister and dropping a house on one of your neighbors.
Preferably either one you don't like or one with a killer shoe collection.
If that proves too difficult for you (Wussy...) improvise.
Feel free to use an inverted pot lid with something heavy on top.
A leg of lamb retrieved from the back of the freezer, an empty quart of milk filled with water or a toddler will do just fine in a pinch.
Of course, the second method may also be appropriate if you just can't get your head around the fact that a brick is involved in cooking this little blessing.
In that case you will probably also object to the term "chicken under a brick."
You are welcome to call it by its Italian name.
Pollo al mattone.

And now a few notes:

Keep in mind a dish cooked with olive oil, like wine or chocolate (and sometimes your hair),is only as good as the product you put into it. And just like wine or chocolate olive oils are complex creatures.Usually descriptive phrases are reserved for tense bouts of road rage or when someone dogs you in line while your Christmas shopping.
However, A professional olive oil taster(yes there is such a thing) uses them just as freely as a sommelier when dissecting a wine.
There are fruity undertones and woody aftertastes.
I can't speak with much authority on the subject but follow this link for a more in depth discussion of olive oil. It kind of blew my mind a little and now Im trying all sorts of olive oils.The page is easy to read and informative.
I was surprised to learn that like tomatoes, olives are actually a fruit.

I tried Filippo Berio extra virgin.
Extra virgin - because it is generally used for marinating and dressings.
Filippo Berio - because I had a crush on Brian Berio n the 5th grade and I liked the label.
In trying new olive oil's out I figured it was best to go with what you know.

Though I'd suggest marinating at the minimum over night in a cool Frigidaire,I have soaked chicken for 48 hours out of necessity.
Somtimes there isn't enough time.
The chicken was sumptuous.


There is a long list of herbs , but use what you've got on hand.
Though disheveled and wild I have a large number growing in my garden and this is the perfect time of year to take advantage of the soon to dwindle growth.

And one last thing about the brick. \
Be careful.
Don'thurt anybody when searching one out.
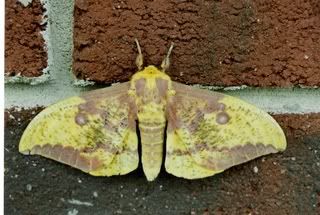
I found this little guy the day of my first mission.

Photo Sharing and Video Hosting at Photobucket

isn't he cute?!
I think he is a type of Imperial moth
(Eacles imperialis).
For those of you shaking your heads and saying, "not so much,"
this little guy
will help impress my next point on you.

Wash the brick.
Wash the brick and cover it in foil.
You don't want any little clay bits falling into your chicken.

Keep a few sheets of newspaper by the range (away from the flame) in order to rest the hot oily bricks on once they have completed their task as heavy weight champions of the wok.
Those bad boys get hot and steamy inside their foil cloaks , and the hot oil on the outside renders them torture devices the likes of which have not be seen since medieval England.

Recipe:

Chicken Under a Brick

4 ilb chicken
1 cup extra virgin olive oil
6 cloves garlic

A handfull of the following:

Thyme
Basil
Oregano
Sage
Mint
Peppermint
salt
pepper

(you could also add in lemon or crused hot pepper. I did not.)


Marinate the chicken:

Place washed chicken in a pyrex dish , giant freezer bag or tupperware container
(be warned if you go the pyrex route it could stink up your fridge).

Crush the garlic cloves and mix with the salt and pepper.
If you have dainty hands you don't want soiled you may complete this task with the tines of a fork.

Rub your selection of herbs all over the chicken.
Rub the chicken all over with the garlic paste , lavishing a good amount of your garlic paste love on the skin.
place some of the herbs under the skin being careful not to shred it up.
Fill the container with the cup of olive oil and remaining herbs/garlic.

let it rest at least over night for the best flavor.

Cooking:

preheat oven 450.

Wash the bricks and wrap them in foil.

Heat up the skillet and then quickly arrange the chicken within.
This with help seal in the juices.
Cover the chicken immediately with bricks.
Cook 25 minutes and try to disturb them as little as possible.

When sufficiently browned flip the chicken pieces over and place in the oven for an additional 25 minutes.

enjoy!

P.S.
The second time I made this I could'nt find my skillet.How you loose a skillet I don't know.However, it is just as easy to do the brick browning in a frying pan and transfer the meat to a baking dish for the oven.

A similar recipe to the one i staretd with can be found here with instructions on how to debobne a chicken.
If you have a good relationship with your butcher you could ask him to do it for you. If you don't, keep in mind most supermarkets sell packaged chicken pieces.

Tuesday, August 28, 2007

samoas cupcakes

Photo Sharing and Video Hosting at Photobucket

Being a big food nerd means you do some things that "normal" people don't do.
You find yourself sending thank you cards to the manager of the produce department at your local grocery store, insisting on talking about your latest food find even though your friends eyes glazed over 5 minutes ago, and getting excited about organizing your stash of flours...O.K. maybe thast just me.
But one unifying characteristic in the family of food nerds is blog reading. Chances are if your reading this you are , in fact, a gastro geek. If you are not a gastro geek you are either in denial or someone Ive badgered into reading my blog.
(Hi Dad!).
If you are in the first category chances are your already well aquainted with creator Cheryl Porro's new website cupcake bakeshop (formerly chokylit bakeshop).
Scratching your head and making a dumb face? Well then, stop reading this schlop I've written and check it out.
Not only does Cheryl come up with some of the most innovative concepts in cup-cakery since the invention of red velvet cake, but she has benevolantly posted an entire section of troubleshooting techniques and general baking instructions if your less familiar with the dark art. These are based on the second best selling girls scout cookies (the first being thin mints), and do not actually involve the cookies themselves. This means you you can enjoy them all year long.

This recipe first came to me by way of the s.f. chronicle's article on cupcakes.
Lady gets READ..ok?!

I recently made these for my sister's birthday.

Before I repost a reposted recipe, let me say that if youve never made caramel from scratch before know that you could be taking your life in your hands.
Sometimes I insist on making everything from scratch .
Part of that is curiousity and the other part is straight up machisimo.
There is baking and then there is BUTCH baking.
woof.
But don't get lulled into thinking homemade caramel is anything short of perilous. Hot melted diamond sugar might sound all sugar plum fairy but its more like a clingy hell imp bent on singeing your unsuspecting arm hair and torching your finger tips.
I think the experience is best described by this short snipett of a conversation I had with my dear friend Rebecca.Though not exactly about sugar it illustrates the problem with any hot sticky substance.

"...I was eating a lean pocket, some kind of cheese and broccoli something...and when I bit into it cheese erupted onto my chin. Of course, your first instinct is to wipe what's burning you off of your chin with your hand. But then your hand is burning. They are tasty but you need to beware. Hot pocket should be called scalding pocket. It could change your life for the worse. suddenly you become suspiscious of anything in pocket form...empanadas...jamaican meat patty's...mcdonalds hot apple pies..."

sage advice.
I mean really, who wants to muddy up the joy that is Mcdonalds hot apple pie?
Some paths are best left untread.
Sweet table sugar morphs. It becomes goopey and angry.Popping like a cap gun it will spit at you and call you names.
With every stir it lurches closer and closer to your knuckles.
It's like a B movie only ironic,not funny ,and scarey.
Life is hard enough without being attacked by mundane house hold goods.

In a pinch I have used caramel straight from a jar.
Subdued and tame it is just as good, and it will save time.
It might just also save your life.

consider yourself warned.
If you choose to brave it use a tall pot for protection.

Ive considered experimenting with plopping square caramels directly in the center but am unsure of how they will melt or if they will stay gooey. they might prove to be a better option then ice cream carmel which ive used in the past. this works out well for the first few hours but if you plan on keeping these for a day or two the cupcake absorbs the carmel.
If anyone tries the carmel squares let me know how it works out.

also , the basic brown sugar cupacake recipe is awesome. It alsways comes out beautifully brown and gently sweet.

Ganache can be made well in advance and frozen in the freezer.

I've made these a few times from my own notes , and looking over the recipe I just realized that the chocolate ganace is actually suppose to go in the center of the cupcake. Not the caramel. This makes sense - cupcakes with a ganace filling would better imitate the taste of a samoa as they have a layer of chocolate underlying each cookie. This would also solve the problem of the greedy cupcake absorbing the carmel.
I had been filling them with caramel centers and leaving a layer of ganache under the coconut icing. I havent gotten any complaints .


Samoas Cupcakes
by Cheryl Porro of cupcake bakeshopcupcake bakeshop.


INGREDIENTS:
The Cupcakes:

1 1/3 cups all-purpose flour

1/2 teaspoon baking powder

1/2 teaspoon baking soda

1/8 teaspoon salt

1 teaspoon vanilla

1/2 cup whole milk

3/4 cup (1 1/2 sticks) unsalted butter, at room temperature

3/4 cup lightly packed light brown sugar

2 large eggs, room temperature

The Chocolate Ganache:

2 ounces semisweet chocolate, finely chopped (i used dark Ghirradeli)

1/4 cup heavy cream

1/4 teaspoon vanilla

The Frosting:

2 1/2 cups shredded, sweetened coconut

2 eggs

10 ounces evaporated milk

1 1/3 cups sugar

1/2 cup (1 stick) butter


Preheat oven to 350°. Line a 12-cup muffin pan with paper cupcake liners.

Whisk together flour, baking powder, baking soda and salt in a bowl. Stir vanilla into milk.

Using an electric mixer, beat butter on high until soft, about 30 seconds. Add sugar, and beat on medium-high until light and fluffy, about 3-4 minutes.

Add the eggs one at a time, beating for 30 seconds and scraping down the sides of the mixing bowl after each addition.

Add the dry ingredients to the butter mixture in 3 additions, alternating with 2 additions of milk. Scrape down the sides in between, and mix until fully combined.

Scoop the batter into the muffin cups, filling each about three-quarters full.

Bake for 20-22 minutes or until the top of the muffins springs back when lightly touched, and a wooden toothpick inserted in the cakes comes out free of uncooked batter.

Let the cupcakes cool in the pan for 5-10 minutes before transferring them to wire racks to cool completely.

Photo Sharing and Video Hosting at Photobucket

For the ganache filling: Place chocolate in a heat-proof bowl.

Heat cream until bubbles form around the edge of the pan, then pour over the chocolate.

Let stand for 1 minute, then stir until combined. Add vanilla and stir until incorporated.

Let cool to room temperature.

Photo Sharing and Video Hosting at Photobucket

To fill the cupcakes: Fill a pastry bag with the chocolate ganache and insert the 1/4-inch metal tip into the top of each cupcake, squeeze the bag until you feel a slight pressure, which should put approximately 1 to 1 1/2 teaspoons of chocolate in each cupcake. You should only squeeze for a couple of seconds. Alternatively, cut off the top of the cupcake, scoop out a bit of the center and replace with 1 to 1 1/2 teaspoons of the ganache.

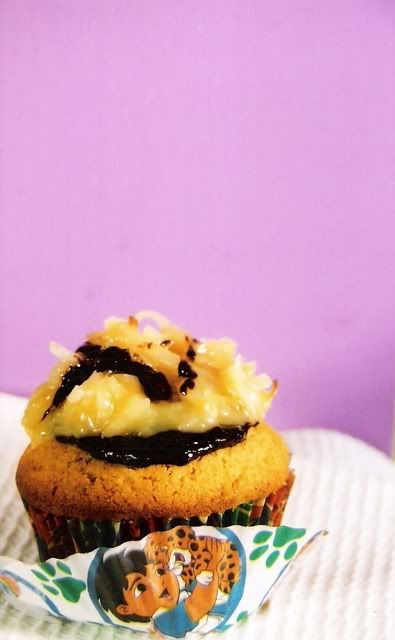
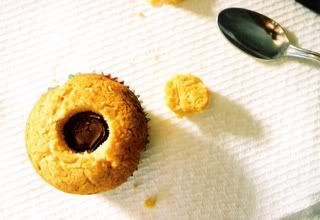
*(my substitution : as pictured cut out a small hole in the top of the cupcake and lift out a pinch of the center. drip some carmel in the center with a teaspoon and place the cut out piece back on top. cover the top with a thin layer of ganache)*

Save remaining chocolate to garnish tops of cupcakes with stripes.

Photo Sharing and Video Hosting at Photobucket

For the frosting: Preheat the oven to 350°.

*(i use dto think toaster ovens were teh most useless thing in teh world but one would come in hany here)*

Spread the coconut on a sheet pan. Toast in oven, stirring frequently to prevent burning, until the coconut is an even brown color, about 10 minutes. Set aside.

Meanwhile, crack the eggs into a small saucepan and beat lightly to break up. Add the milk, sugar, and butter. Cook, stirring constantly, over medium heat until thick, bubbly, and golden, about 15 minutes.

Press mixture through a fine metal sieve and into a bowl to remove any lumps. Add 2 cups of the coconut, reserving the remainder for garnish, and stir to combine. Let the mixture cool, and spread generously over tops of cupcakes.

With a fine-tipped pastry bag, or the edge snipped off a plastic bag, pipe stripes of chocolate ganache over the top of the coconut icing to look like a Samoas Girl Scout cookie. Garnish with remaining toasted coconut.

Yields 12 cupcakes

PER CUPCAKE: 550 calories, 7 g protein, 62 g carbohydrate, 32 g fat (21 g saturated), 133 mg cholesterol, 275 mg sodium, 1 g fiber.

Friday, August 10, 2007

"Fools Rush In"

Photo Sharing and Video Hosting at Photobucket

Elvis' middle name was aaron,he was an identical twin, his father was a bootlegger, my grand mom tells me he was Hungarian , and he made 33 movies.
Apparently
in his life he also made a large number of fried peanut butter and banana sandwiches which have inspired this new riff on the Reese's Cup.

On occasion the Reese's people get wicked weird.
They do things like use white chocolate, add caramel into the mix or cut out their precious cups to look like Easter eggs, bunnies and Christmas trees.
Then there was that whole Oreo bottomed cup mess.
But I get it.
Sometimes you've got to break out the leather and spice it up.
Hershey's has released this latest hybrid for a limited time to commemorate the 30th anniversary of Elvis' death on August 16th 1977.

I have a hard on for peanut butter in general and bananas are a daily staple in my diet.
While I don't often eat Reese's cups , they have been known to fall into my mouth like manna from heaven.
They are reserved for special occasions.
Like when one of your girls is visiting from San Fransisco and it's 3am and you're riding through empty back lit streets feeling like your heart could burst at any moment from love.
Sacred, if eaten everyday they would quickly become profane.
I have been practicing the same ritual for devouring them in secret since I was ten.

I was apprehensive.
The seemingly morally unconscionable combination of banana and Reese's is sacrilegious. It sounds like the kind of thing you'd sneak on the playground on a dare or something you'd slide over your lips to gross out your sister while trying not to gag.
perilous.wrong...exciting.

i didn't even hold my nose.

So what was it like?
The banana is no diva.
In fact it proves to be a team player.
You can still enjoy the Reese's-ness of it all.
Though nothing like a banana and peanut butter sandwich,the taste instantly brought back memories of banana Runts.


I say forge some new territory.
Bust out your telescope,put on your tri cornered hat and get your explorer on.
And just think, with every purchase you get a chance to win an Elvis car!

I can't even imagine what that would look like, but I want it.

Monday, July 30, 2007

Under my Plumb. Pluot and Plumcot Lekvar

Photo Sharing and Video Hosting at Photobucket

I don't really care about spelling.

Sometimes I spell things in old english and other times my words don’t even look like members of the English language.
But
sit across the room and ask me how to spell a word.
My inner 5th grade puts down the game boy, steps up to the mic and suddenly i'm in the running.
Akeelah can keep her B cause i've got that jawn on lock down!
So my point?
relax the lever on your correction tape ladies,
I realize I spelled plumb wrong for its use but it just looks better that way.
And don’t give me that look.

Though possibly cause for argument in a heated game of scrabble , Lekvar is a real word.
Lekvar is a Hungarian filling used in pastries making a big appearance in our house around Christmas time when my mom busts out the rosette irons and kipfels. It is usually made out of prunes or dried apricots and constitutes a thick jam that stays put when placed.

This is my attempt at a twist.

Pluots and plumcots are both apricot and plum hybrids. Pluots tend toward more of a plum taste while plumcots tend to be 50/50.
There are also several types of plumcots. They range from perfectly plumb looking to striated green red warbles. I have found this last variety, often called "dinosaur eggs", the best for making jam.

I tried several variants on plumb recipes and settled on this combination. Though not as heavy with pectin as it could be, making it a little more on the loose side makes it more versatile as a jam. You can use a little more sugar if the plumb derivatives are less sweet. I prefer to rely on the natural sugars of over ripe fruit and use less sugar. The general rule is 1 - 1 1/2 cups of sugar to each pound of fruit.
A canning technique post will follow but really it's a forgiving and highly communicative process that lets you know when things have gone awry. If the lids flex when pushed down they didn't seal and so must be used immediately.

Photo Sharing and Video Hosting at Photobucket

Pluot and Plumcot Lekvar:

  • 2 ilbs plumcots
  • 1 1/2 - 2 ilbs pluots
    (roughly 4 1/2 - 5 cups)
  • 1 lemon juiced
  • 3 cups sugar (and a handful extra)
  • 1 package sure-jell


Traditionaly lekvar is made in a copper pot and I do believe this makes a difference. Though I can't speak with AUTH-or-it-TAY on the chemistry of it all I know aluminum is the bad guy. Something about it reacts poorly with the acids your depending on to help the jam become jam. Stainless teel is also fine to use. Its my pot of choice at the moment as copper pots are wicked expensive.

I'd also like to say something about the sugar here. The first time i made a bacth it was good but sweet rather then tart and super jelled. The jams consistancey is dependant on the proper mix of acids and sugar along with pectin. The second time I played sugar limbo just to see how low I could go. If your worried about it setting up add or want that thicker consistancey add in and extra cup or two (4 - 5 cups of sugar. 6 if youve got 4 full pounds). After a batch or two you'll get a feel for whats going on in. I've had success with roughly 3 1/2 but mayeb I'm pushing my luck.If your after more of a traditional lekvar consistancey go with 1/2 to an extra 3/4 package of sure-jell.

Pit the fruit and quarter. Leave the skins on. Throw into a pot (and stir constantly over low-medium heat till the juices are expressed.
Dont cook the hell out of your jam or its gonna get soupy. Keep in mind those hot little fruit fibers also need to hold up in the wicked heat of the canning pot.Over cooking isnt going to do anyone any good.
add the lemon juice.
add the pectin and stir thouroughly then add the sugar and boil full throttle for one minute.

At this point your ready to can accordingly.

Good job. You make daddy proud.

Thursday, July 19, 2007

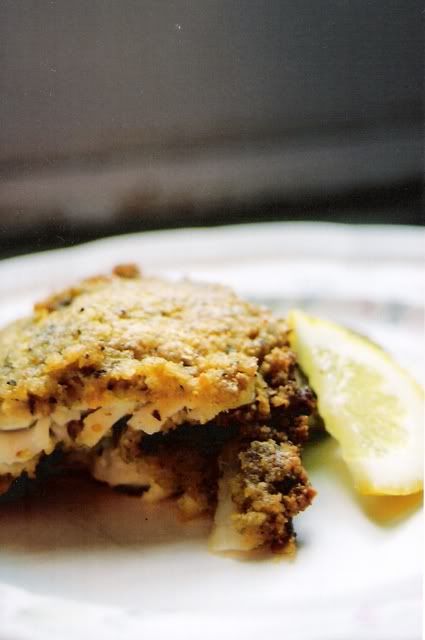
Pistachio and panko crusted Tilapia

Photo Sharing and Video Hosting at Photobucket

Panko.
It sounds like something your going to have to clean.
Hard.
Like with a Brillo pad.

In truth nothing could be lighter or more crisp. Panko are Japanese bread crumbs readily available at most Asian markets and increasingly sold at places like Pathmark. Made of a finely worked wheat base ,it makes a beautifully browned and crunchy crust. Think tempura or plumb pork.
Panko is the uber crumb.

Paired with Pistachio it makes a nice overcoat for a good piece of fish or a chicken boob. (ok ok now im making it sound obscene...like a flasher...)
I've seen a lot of similar recipes online that use a lemon sauce or some other accompaniment but I prefer mine a cappella over a simple salad or with some brown rice.

The recipe that follows is approximate. You may need to add more or less of something but its a place to start:

  • 2 pieces of fish. I used Tilapia because it isnt "overly fishy."

  • 2 cups panko

  • a little under 1-1/2 cups crushed pistachios

  • large garlic clove minced

  • tblsp parsley


  • 1 tsp honey

  • juice of one lemon


Roast shelled pistachios in a hot oven at about 300- 350 until they are browned and smell fragrant.
crush in a cuisinart or with the side of a large knife. They dont need to be entirely pulverized but make sure they are somewhat fine or you will have a completly different and less appetizing recipe on hand. I like to call it "Panko GRAVEL crusted Tilapia."

Mix pistachio,panko, garlic, and parsley to create your breadcrumb.
At this point you can either choose to simply roll the fish around in it or use some sort of adhesive food to help the breadcrumbs stick.
One time I used lemon juice mixed with a small amount of honey.
Another time i used some fig basalmic.
I say Do it up.


There are two plans of attack.
You can either brown the breaded fish in the frying pan first and then place it in a hot oven (350) for about 5-10 minutes.
or
Put a little olive oil in the bottom of a heat save dish and cook covered in the oven set to 400 for about 10 minutes or so. Flip half way through to ensure the panko is crispy on both sides. The higer heat helps it crisp up.